Install and configure VMware vCenter 6.5 Appliance
Wolk you through installation of the new VMware vCenter 6.5 appliance, in this tutorial we are covering this areas, Installing appliance, Admin interface, creating folders, datacenters and clusters
Let’s get start
Here I downloaded the iso image of the vCenter appliance, mount
Goto “\VCSA-ui-installer \Win32” and double click on installer.exe

Once the installer started you can see that we have 4 options,
In this tutorial we are gonna be installing a new vCenter Server Appliance (select the first option)

The installation broken up into two stages
Stage one: is the actual deployment of the appliance
Stage two: which is, the appliance Installation

Aaccept the license agreement

We have two options to deploy the vCenter Appliance Server “Embedded platform services controller” or “External platform services controller” with this option the platform services controller is sitting externally.
I am going to be installing the “Embedded platform services controller”

Where to deploy the vCenter server appliance
Type the ESXi host name/IP address followed by the root user / password

Ask for the virtual machine name of the vCenter server

Select the best match your need
 Select the data store, you wish to install the vCenter server appliance onto then click next
 Configure the network setting of the appliance, make sure that this host name record is created in DNS
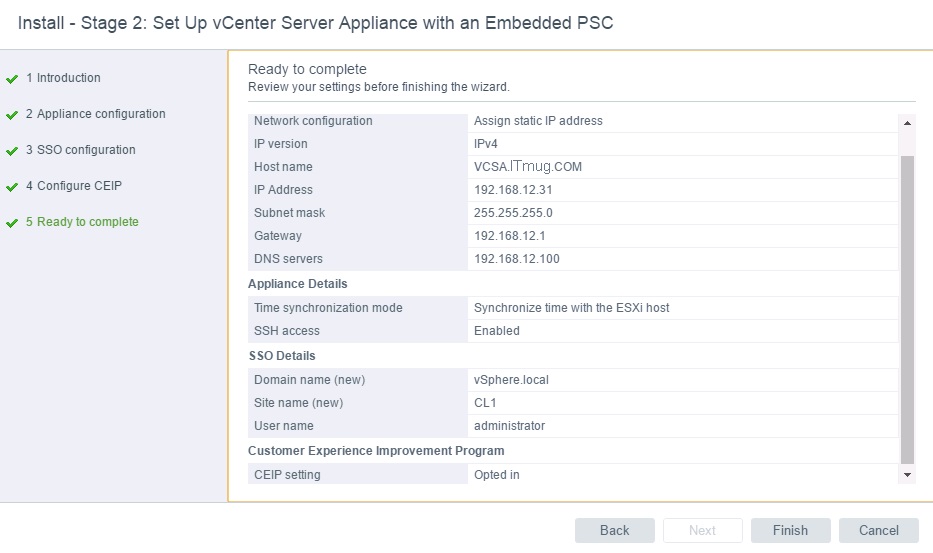
 Give the summary of all setting entered and if you are happy with the setting click on finish
 Deployment of the vCenter server Appliance has begun.
We have successfully deployed the vcenter server appliance, you can see important link which is for logging to the vCenter Server Appliance management
 Proceed to stage 2 which is the appliance Installation
 Setup the NTP server and the time synchronization, you have two option synchronize with ESXi or NTP service
I am gonna be selecting the”ESXi” synch and enable SSH Access to the service.
 Setup the SSO configuration

 Click on finish to setup the appliance
 Stage two has now successfully completed, you can see two important the first link is for vSphere web Client and the second link is for Appliance Getting starting page

Admin interface
Access to vCenter server management site, you can access the site by typing the vCenter server name and port: 5480
https://vcsa.ITmug.ca:5480
Login as root and enter password 
First screen displaying the overall health status, we can backup, reboot and shutdown the appliance from this page
 Within networking we can see network utilization graph and clicking on the “Manage” option displays current network setting

Backup the vCenter 6.5 Appliance
Click on backup, and then select the protocol
In this tutorial I will use FTP as a backup destination
 We have two parts that we can backup
“Common” parts which consists of inventory and configuration
“Status, Events, Alarms and Tasks” parts which contains historical data in vCenter Server database
 Display the summary of the setting, click ‘finish’ to start the backup
 Once the backup completed, now we have got a full backup of the vCenter Server Appliance simply we can restore it by running through the vCenter server installer and select restore option
Syslog Configuration
From syslog configuration, you can setup syslog logging level, syslog host, port and protocol
Login to vCenter

 Right click select a new data center type a datacenter name


 Right click on the datacenter and click “New Cluster”


Right click on the Cluster and click “Add Host”

Type ESXi name or IP, the user root and password


Accept the certificate from ESXi, as it is a new host it dos not contain any VM

Give you the summary click “Next” to continue

Select the Lockdown mode, when enabled lockdown mode prevents remote users from logging directly into the host
 Click “Finish” to add the ESXi Host to the cluster


If you have any question, feel free to contact me
Please Rate This post
